


Executive Initiation part 1 stage 4
Cousac on Oct. 15, 2009
Alright, folks, the update that none of you were waiting for :)
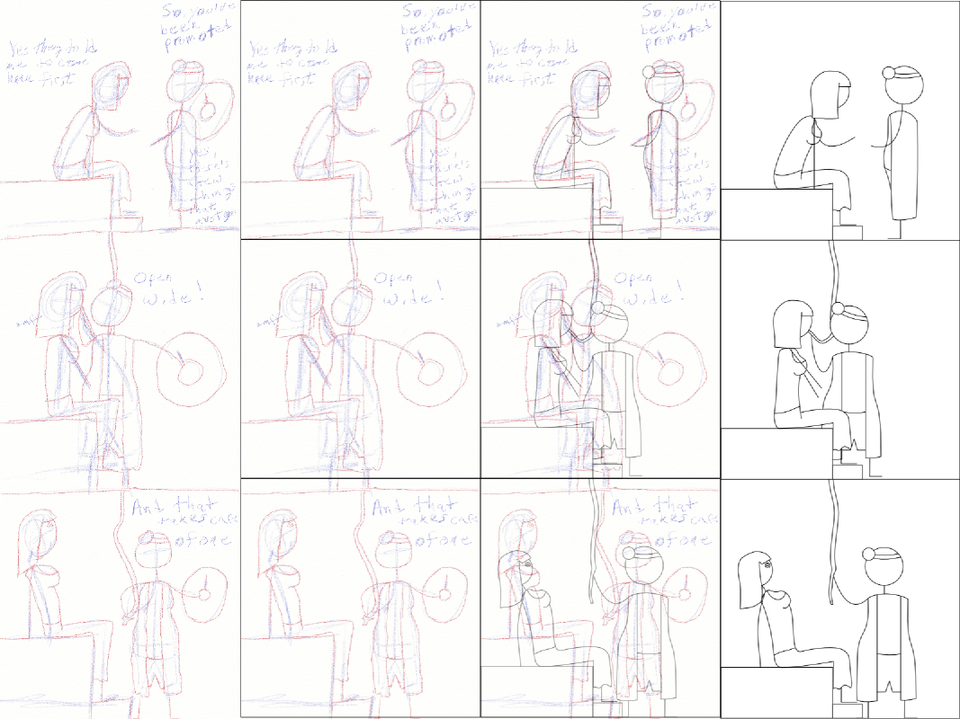
This here is the smaller version of the original image which can be found here. This image represents 4 steps in this stage.
First step, I imported the image, changed the layer's transparency to 50% and locked it. Locking a layer will ensure that I won't accidentally write on the layer nor move anything on that layer. you can also see that by reducing opacity, the blue fades but the red stays. Like the good little red it is. :)
In the next step, I created a new layer above the source image layer. On this layer, I layout my frames. As a general rule, (for me anyway) is single panel has 800x800 frame and 2+ panels is 400x400 frames. I lock this layer when I'm done with it.
Third step, I create a new layer UNDER the source image. This way I can see the source unobstructed. And… I trace away. I make some changes as I see fit.
The last-step is just seeing it without the source image.
You may have noticed the doctor's missing an arm in panel 2 & 3. Don't worry, dude's ‘armless! get it “armless, ’armless”? Meh, what do you know! Anyways, that “dial” in the source image is what the doctor will be reaching for. but I need to refine its look. Until I do, he's not to touch it, so I tore his arm off and fed it to him. That'll learn ‘im. Um… ignore all that last part. *chuckles nervously*
Next post, I will be refining the “dial.” Stay tuned and kiss your mothers for me, I mean… thanks for watching.
In the meantime, seeing as I’m sick as a dog, I'm gonna drug myself and sleep. sleep the sleep of millions! Um… til next time.


ghostrunner at 9:34PM, Oct. 16, 2009
take drugs-:)