

A Simple Lineart Tutorial (for mouse or tablet)
finalfantasyfreak_07 at 8:51AM, Sept. 13, 2007
This is just a fast and quick way I use sometimes to clean and enhance existing linearts to prepare for coloring in photoshop.


(4 star average out of 17 votes)


All right, first thing's first. Open Photoshop and then the desired lineart you wish you work on. I use Photoshop CS, but I'm sure it'll work on 7.0, and probably 6.0. Everyone else with a higher version, you're too rich. >.>;
And there you have the lineart I will be using to explain. See all that scratchiness around the edge? My scanner is dumb, and unless my picture has a dark border, it'll crop my picture to only the darkest parts. That's right, this tutorial is out to save even those with stupid scanners.
So, go right ahead and start erasing the collective poo that accumulated on your page: eraser debris, bad erasing, smudges, etc. I know I'm not the only bad lineartist out there.
Ah, that's better. But, the lineart is also really, really light. Let's go about fixing that, shall we?
First, go to “duplicate layer” and duplicate your background. You should have “background copy” but call your layers whatever you like, “background,” “Samuel,” “Spongecake,” whatever title tickles your fancy. Toss out the first “background,” then go to layer–>new layer. Fill it with white with the bucket tool, and place under your background copy layer, which I thus named, “outlines.”
And here's where we darken. Go to image–>-adjustments–>brightness/contrast, and darken and lighten however much you need. However, I wouldn't darken TOO much, because of a further step. I darkened mine to here:
And I like to add a little color to my linearts. This is optional, and if you do want to color yours, again, pick whatever makes the baby Jesus smile (or Buddha, or whoever you happen to like). Go back to image–>adjustments–>color balance. I picked something like this, at least for this tutorial: 
Here we go, the final steps to happy, quick linearts. HERE IS ALSO THE MOST IMPORTANT STEP. See under your layers panel, the little bar that says “normal”? We don't want a normal lineart, oh no. Click it and select, “multiply” for only the layer that has your lines. This will allow us to color under our linearts. The, take the multiplied layer and duplicate it. It got even darker!
But, why do that when you could've just gone darker in the contrast stage, you ask? Because this extra layer is what we're going to use to smooth the lines. With your new outline layer, go to filter–>blur–>gaussian blur.
Yay, smoothness! This last part is actually optional to do in the beginning, or the end. I usually do the end because the blur will throw me off sometimes, but some prefer to do the beginning. Just experiment!
This was my final product, after coloring and adding textures (disclaimer: to learn about where I got the textures, go to the page in my comic):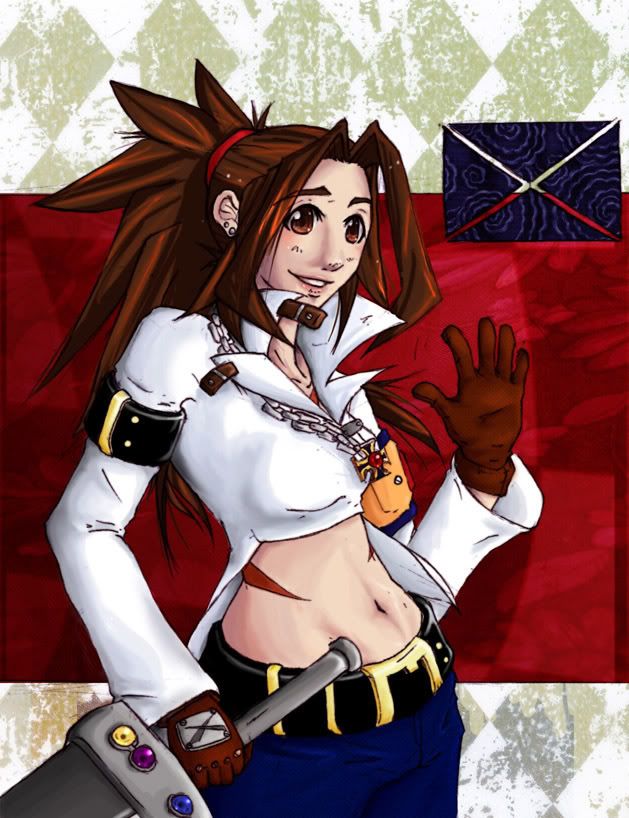
I hope this was useful to someone. ^^; If anyone wants anymore types of tutorials or just happens to like this, or has any feedback, feel free to PQ me with your input. As always, have fun drawing. .w.


The_Sword_That_Heals at 6:47AM, June 1, 2012
Good tutorial... I took the liberty to print it out.